Team Members (TM) can report timesheets at tab TIME. First, they need to prepare the grid for the week:
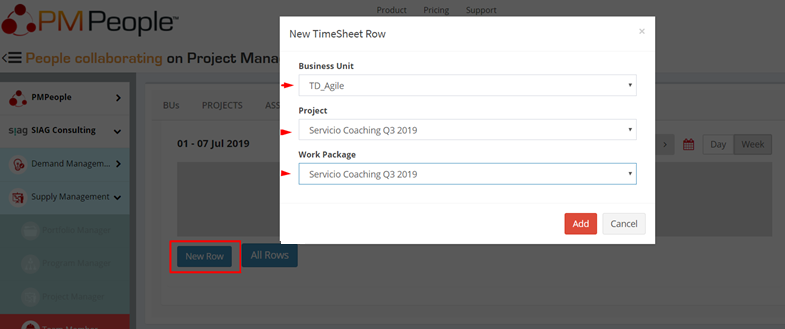
They can set as many timesheet rows for a week as they need. Follow these steps for each row:
- Click button [New Row]
- Choose Business Unit, Project, and Work Package
- Click button [Add]
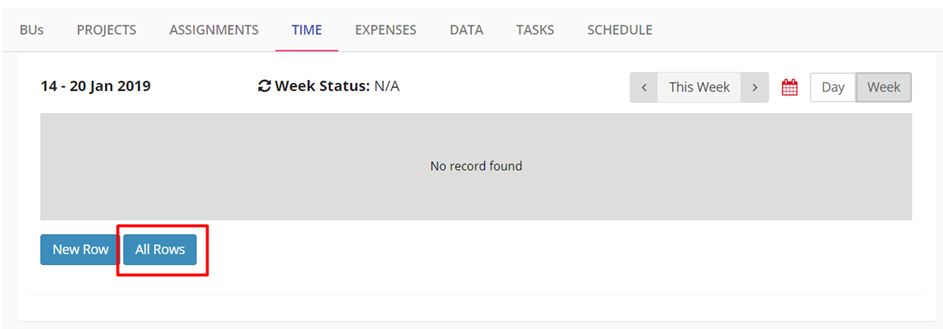
Click button [All Rows] to automatically load all possible assignments for this week:
Any row can be deleted by clicking the “cross” icon [X] on the right:
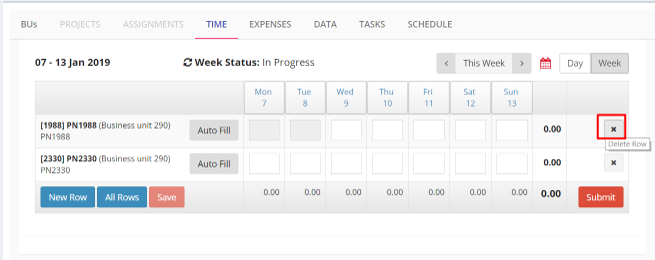
Click button [Auto Fill] to automatically initialize the row with maximum hours allowed each day according to the assigned project calendar.
Click button [Save] to save the right values. Actual work hours for the current week, or any other week, can be saved any time. Timesheets are effective only after clicking button [Submit].

There are 4 possible timesheet statuses for a day:
- In Progress: User has not yet submitted timesheet to the project manager.
- Submitted: User has submitted timesheet to the project manager.
- Approved: Project manager has approved timesheet.
- Rejected: Project manager has rejected timesheet.
Click button [Submit] to send data to project manager for approval. User can only edit “in progress” or “rejected” timesheets.
There are 4 possible timesheet statuses for a week:
- In Progress: Some timesheet of the week is in progress.
- Submitted: All timesheets for the week are submitted.
- Approved: All timesheets for the week are approved.
- Rejected: Some timesheet of the week is rejected.
Click button [Day] to see details of the timesheets for a day. Each row is a different assignment (project/package):
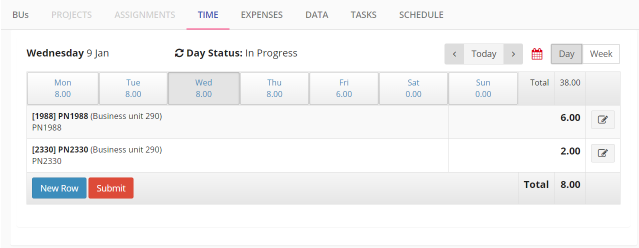
Click the “pencil” icon to edit timesheet details and change start or finish hours, or to add an explanation for the project manager:

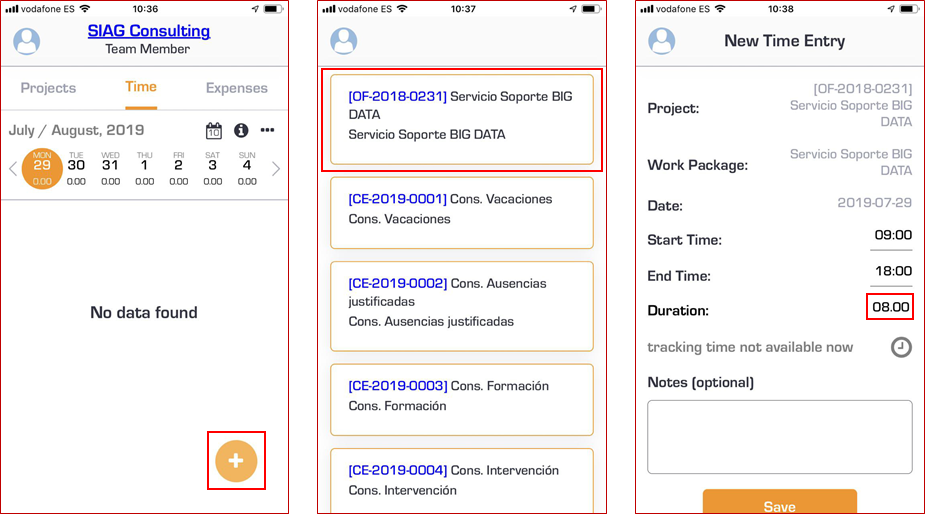
Users can also attach files concerning the work done and the hours used. A medical leave document could be attached, for instance. Team Members (TM) can report timesheets with the mobile application. Click the tab Time, select the day, click the “plus” icon [+], select one of the possible assignments, and update Duration:
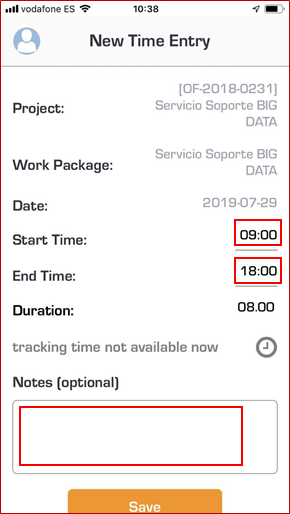
If needed, enter start and end time. Use the field Notes to add an explanation to be read by the project manager:
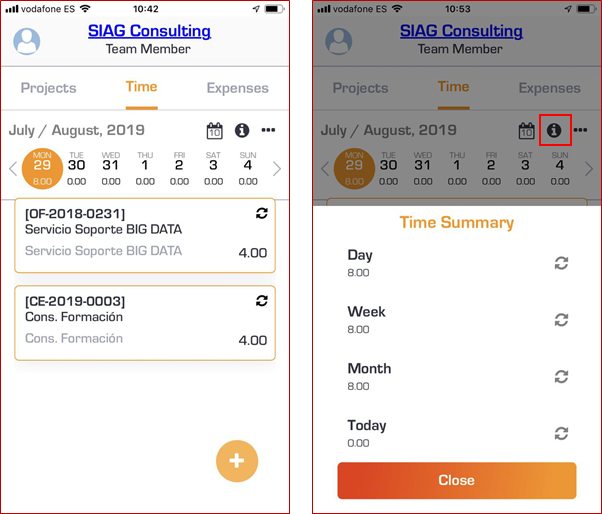
Click a day to see the timesheets reported for that day. Click the “information” icon to see a summary with the hours for this [Day], this [Week], this [Month], and [Today]:
Work hours can be entered any time, but they will be effective after submission:
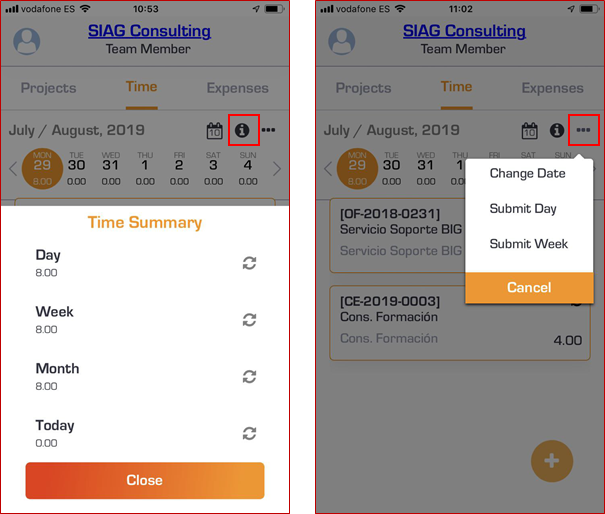
Click the “menu” icon to submit the hours for the day [Submit Day] or for the week [Submit Week]. User can only edit “in progress” or “rejected” timesheets.
Time can be tracked automatically, via web or mobile application, using the timer icon.
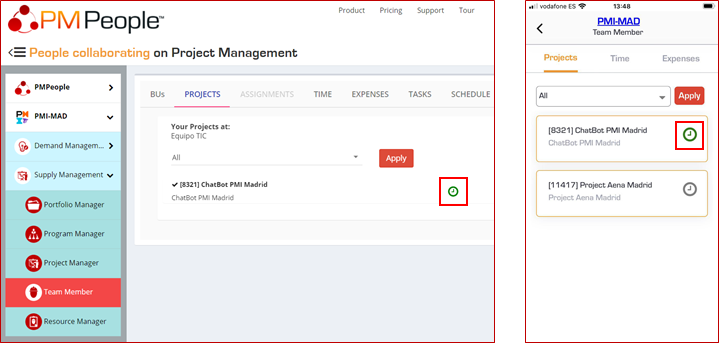
You can start tracking time for assignations with the timer–icon is green– only if:
- Assignation is added to the timesheet grid for the week.
- Timesheet status for the day is “in progress”.
- System hour is within the calendar working hours.
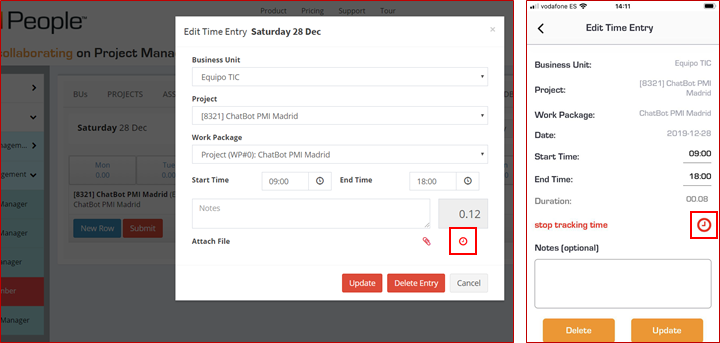
If the conditions are met, you can click the timer –icon turns red– to track time. Click again –icon turns green– to pause tracking time.
If timer is running, you can see the timer icon in timesheet detail:
PMPeople is the tool for the project economy. It is aimed to unify professional project management by these differential points:
- Designed by and for professional project managers, following professional project management standards.
- Online productivity –less meetings, less documents, less workflows– through distributed collaboration among 12 specialized roles: Organization Owner, 6 roles on demand management and 5 roles on supply management.
- Freemium product –unlimited time, unlimited users, only managers have to pay– usable via web and mobile application.
Start using PMPeople for free, for unlimited time and for any number of users. In premium organizations, only managers have to pay. Several roles –stakeholders, team members, sponsors and resource managers– are always free. You can increase or decrease your premium seats according to the organization actual needs. Premium organizations have access to our interactive support through Slack. Our servers are located in EU. This software can also be hosted on customer premises.
Jose Barato
Related posts
Categories
- Business (16)
- Demand Management Roles (14)
- Frequently Asked Questions (7)
- Guide (26)
- People (23)
- Assignments (2)
- Feedback (2)
- Project Team (3)
- Tracking Time And Expenses (2)
- Process (9)
- Closing (2)
- Executing And Controlling (2)
- Planning (1)
- Project Management (67)
- Management Frameworks (18)
- Organization Owner (OO) (3)
- Project Economy (54)
- Tools (19)
- Supply Management Roles (5)
- Training (6)
- Uncategorized (1)


